We had a wonderful weekend celebrating. It begun on Friday when the kids and I celebrated the end of the school holidays with a visit to Eureka Tower. From there we headed to a special boys 10th birthday. It rolled perfectly into Saturday where we celebrated a very dear and special friends 40th. It was one of the most perfect birthdays I have ever attended. Full of fun, love, tears, amazing food, laughter and incredible company. It was very grown up - the venue, the food and no kids. However the kids weren't left out of all the celebrating. The partying continued back at our friends home into the night and the kids joined in on the fun. I didn't take my camera but Baby Mac has captured the day perfectly here. Incredible, right?
I'm off for an early night - all the talking, dancing, fun and frivolities exhausted me. Now to focus on my return to work. It's going to be hard after such a special and memorable weekend.
Sunday, 7 October 2012
Friday, 5 October 2012
End of School Holidays
Today is the last day of school holidays. I have to admit, I love the holidays. I enjoy being with the kids and having a break from the school routine. These holidays went super quick for me. I think that was because the first week was spent in Sydney and the last week was filled with many play dates, birthdays and some errands that needed to be done before I return to work.
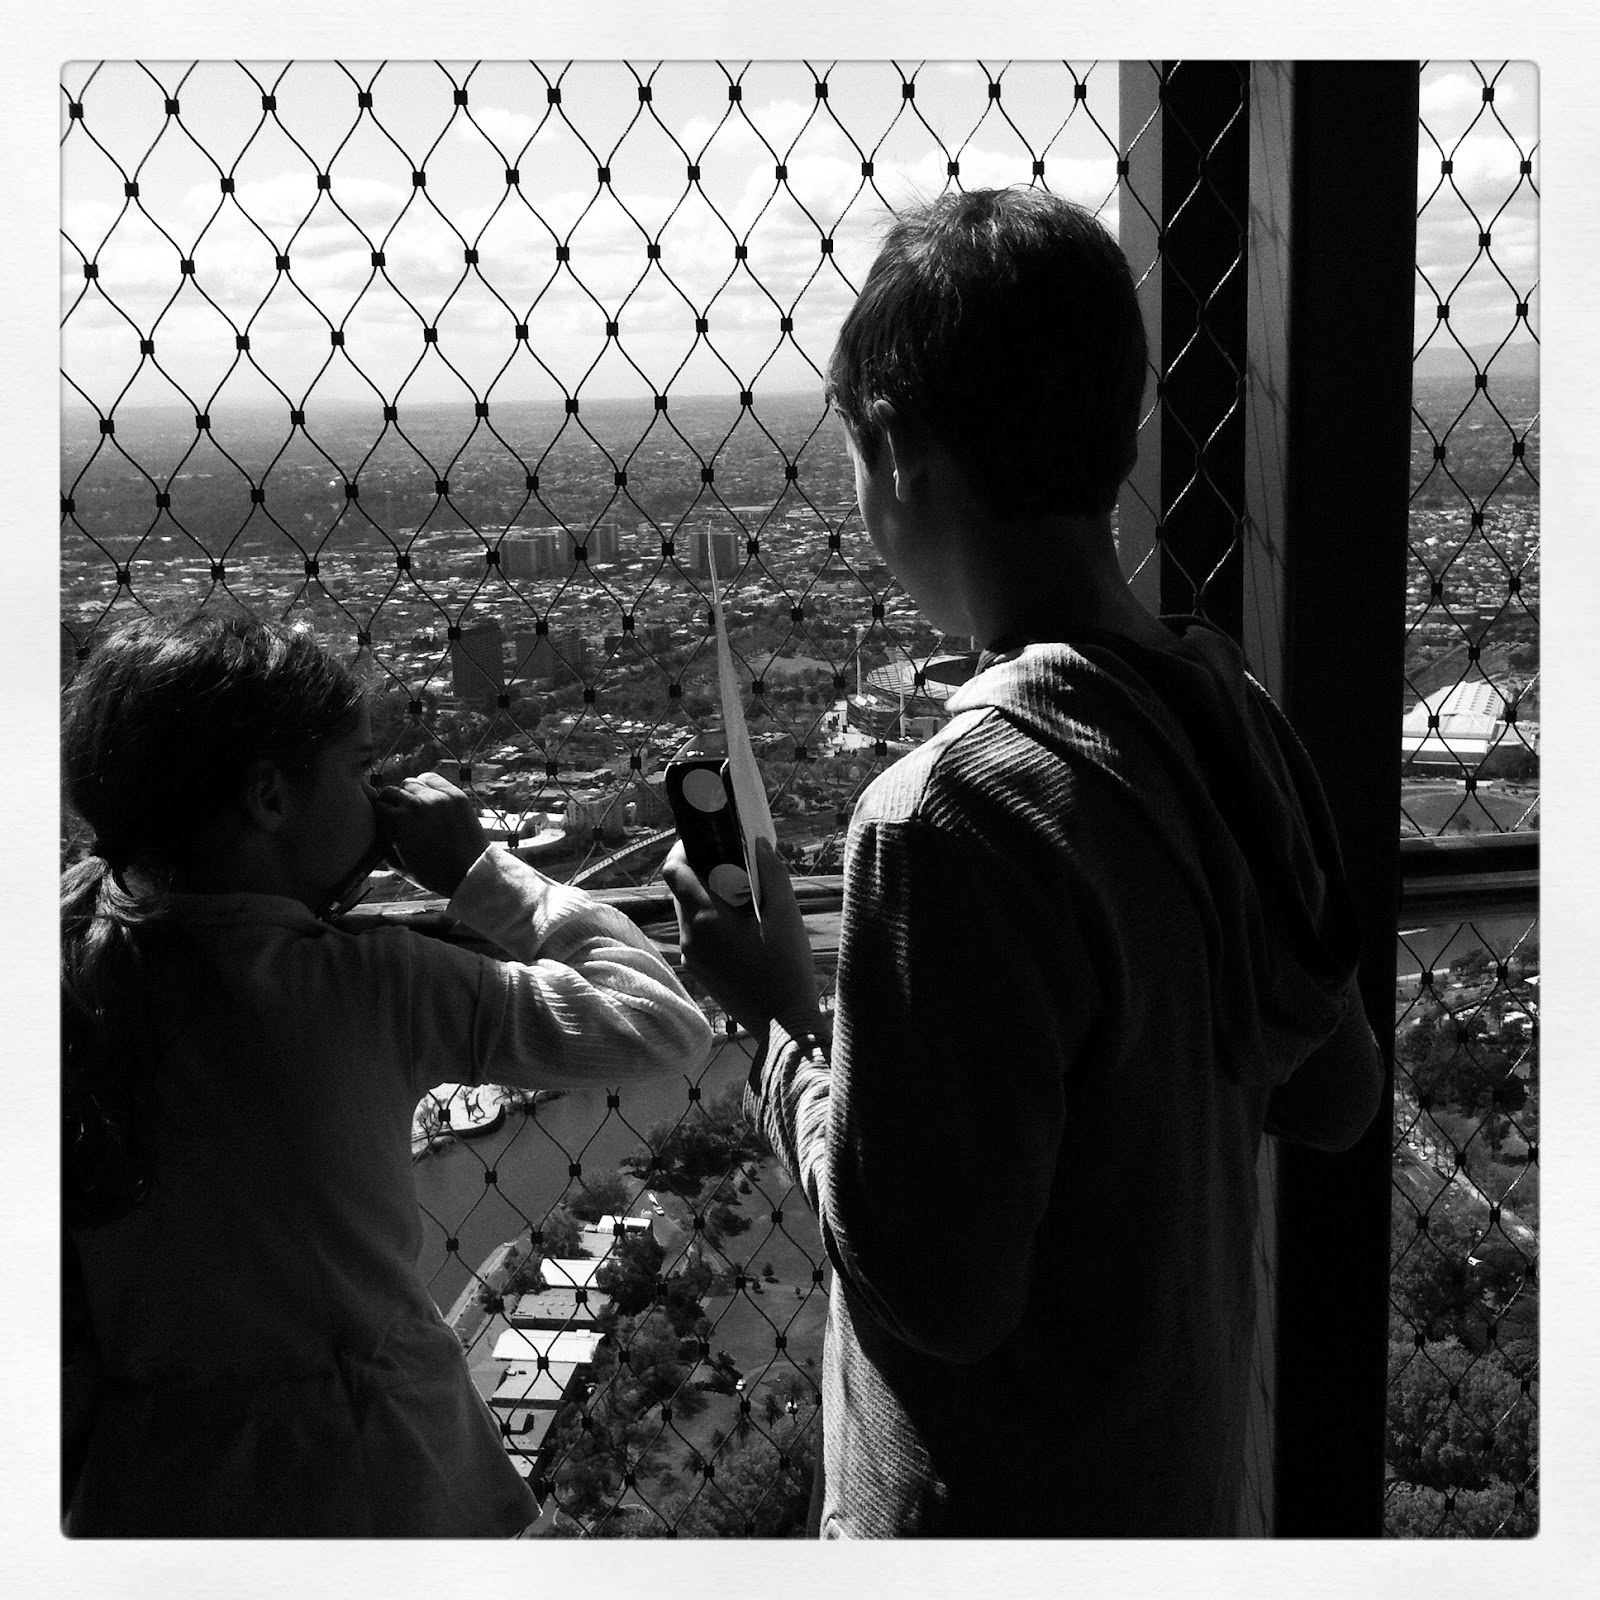
Our final day was spent doing something that the kids have begged to do since we moved to Melbourne - Eureka Tower. It was the perfect day for it. Not too hot or cold, only a slight breeze and clear skies. We could see for miles. It really was worth the visit.


This afternoon we're off to celebrate a special boys 10th birthday and tomorrow we'll celebrate his Mum's 40th in the Yarra Valley. What a perfect way to end the break.
Thursday, 4 October 2012
Crocheted Cloths

Yesterday, Melbourne put on a spectacular day. The sun shone done on us all day and the kids enjoyed playing outside - painting, board games, skipping and a bit of basketball. Me, I enjoyed watching them and soaked up the suns rays and got a bit crafty. I went through my wool/cotton stash and discovered some yarn from a previous project that would be perfect for some much needed dish cloths. On a day like yesterday, I enjoy making little things that don't take up a lot of my time because they tend to remain unfinished and that frustrates me no end. The dishcloths above fitted all my criteria for some sun filled crafting - they're quick and easy to make, they're a great way to use yarn scraps and they're functional and needed.

What you need
- Cotton yarn (I used 4 ply because it was what I had but you can use any ply)
- Use a crochet hook to match the yarn ply (I used a 2mm hook)
- Scissors
- Darning needle to weave in ends
How to
- Chain 34 stitches with your crochet hook
- Insert the hook into third chain and do one half double crochet stitch into each chain.
- Complete row
- Chain 2 stitches at the end of each row and continue working in half double crochet until the cloth reaches 20cm (about 24 rows)
- Cut yarn and toe off
- Weave in loose ends using a darning needle
Here is a youtube clip on how to do a half double crochet stitch
Tuesday, 2 October 2012
Postcards from Sydney
Unfortunately I didn't take a lot of photos from our time in Sydney.
I usually take loads so I'm not sure how I only ended up with a few but here is what I have.
Excitement as we board the plane in Melbourne.


Taking it slow at my sisters house.

Paddy with his youngest cousin (my sister's daughter), Annie.

Grace was beyond thrilled to push Annie in the pram.

Cousins!
Walking through the streets of Glebe with my sister's twin boys, Hamish and Liam.


My parents live in a rural part of Sydney and the kookaburras visit them daily.
Paddy was in awe of them and loved waking up and greeting them each morning.


My parents took the kids to Putt Putt. I think I lost my ability to count because courses that I thought took 5 strokes, apparently only took 3. Yes, there was the occasional scoring cheat - two guilty parties one start with P the other G!


Checking out the bookstore at Sydney airport before returning to see Martin in Melbourne. Yes, he had to stay here and work while we headed to warmer weather in the north. Poor Martin!

A huge apology to those that we did not get to catch up with.
Unfortunately this trip was a quick one and we ran out of days to see everyone.
Headband ~A Tutorial
 Headbands are popular at our house. I wear one when I run or when I want my hair off my face. Gracie wears one to school, to visit a friend or while she is playing at home. They are a cute way to spruce up the everyday hair down look. I have made many over the years - for Gracie's friends as party favours, for school fetes and fairs and as birthday gifts for special friends. You do not need a lot of sewing experience to make these so I have put together a tutorial so you can make some for your family and friends.
NOTE - The dimensions below are for a 5-8 year old child. You can work with the dimensions depending on the size of the child/adults head
What you need...

- One rectangular piece of fabric 40cmX12cm
- One rectangular piece of fabric 20cmX6cm
- 12cm piece of wide elastic
- safety pins
- thread (matching or contrasting)
How to...
Take the larger piece of fabric and lengthways, fold the fabric twice
Press in the side seams
Fold the smaller piece of fabric in half with right sides together and press

Step Two
Using straight stitch, sew the seams about 5mm from the edge


Step Three
Turn the small piece right side out
Using the safety pin, slide the elastic into the casing
Secure the elastic with pins and sew into place

Step Four
Fold in the ends of the larger piece as shown below.
The width should be a little more than the width of the elastic casting piece
Stay stitch the end to secure the edge


Step Five
On one side of the larger piece tuck the elastic casing into the fold that was made at the edge (The larger piece should be right side up)
Secure with pins

Sew into place

Step Seven
Trim end to reduce bulk. Be careful not to cut stitching
Do this to the other edge of the larger piece

Step Eight
Check sizing

Enjoy making this for your little girl or make one larger for yourself.
Monday, 1 October 2012
Mini Chocolate Chip Biscuits
It is a tradition at our house to do lots and lots of baking together in the school holidays. One of the kids favourite thing to bake is chocolate chip biscuits. They can almost make them independently from scratch with me just hovering in the background. We have a favourite recipe that we use. It is super light and when you're trying to stay healthy and watch what you eat (like me!) the recipe is a real winner.

Ingredients


Mini Chocolate Chip Biscuits
Ingredients
- 25g light canola or margarine spread
- 2 tabs canola oil
- 100g brown sugar
- 1 teaspoon vanilla essence
- 1 egg white
- 75g plain flour
- 1/2 teaspoon baking powder
- 75g chocolate chips (I use dark chocolate)
How to
- Preheat oven to 180'C
- Cream butter, oil and sugar in a food processor until pale and creamy
- Add vanilla and egg white and beat for another 2 minutes
- Sift together the flour and baking powder and add to the butter and egg mix.
- Fold in the chocolate chips
- Drop spoonfuls of mixture evenly on to paper lined baking trays (approx. 24 spoonfuls)
- Bake for 12-15 minutes or until golden
- Cool on a rack
NB - These can stay fresh for about 1 week in an air tight container
Delish!

Subscribe to:
Posts (Atom)