In my previous Mother's Day post I had a link to these Fingerprint Pendants. Unfortunately, I could not get my hands on Sculpey as mentioned in the tutorial. So, yet again, I headed to Spotlight to see if I could find an alternative here in Australia. I ended up purchasing some Crayola Air-Dry Clay for $14.99. I had no idea if the product would work but I was determined to give it a go.
This is a LONG tutorial so my apologies in advance.
Fingerprint Bookmarks
Part One
Making the Fingerprint Charms
What you need:
- A small ball of Crayola Air Dry Clay
- Baking paper
- Rolling Pin
- Play dough cutters (I used a star and a heart)
- Skewer
- Modge Podge
- Glitter
1. Roll out some of the Air Dry Clay until it is about 3mm thick
(We rolled it out on baking paper so it didn't stick to the kitchen bench. It also makes for easier cleaning)
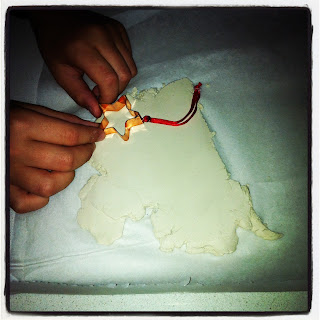
2. Press the desired play dough cutters into the dough
3. Remove the shape from the rest of the clay. We found that the edges were a bit dry so we added a drop of water to smooth it out.
4. Using a skewer, make a hole in the shapes. This will be threaded onto a ribbon so ensure that the hole goes all the way through the shape.
5. The children pressed their fingers onto the clay.
6. Turn the shape over and using the skewer write a message to the person the gift is for, or as we did, write the child's name and year the gift was created.
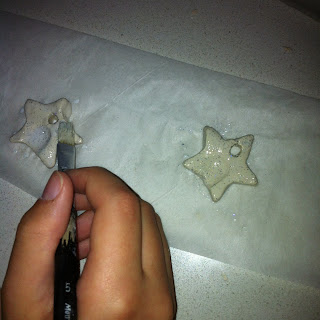
7. Mix together some Modge Podge and glitter
8. Paint the mix onto the shapes and let dry for 48 hours
Fingerprint Bookmarks
Part Two
Making the Bookmark
1.Using a lead pencil mark out a rectangle 20cmx10cm on the front of the fabric measuring 23cmx23cm.
What you need:
- Fabric 1 : (Cut 1) 23 cmX23cm (piece for bookmark front)
- Fabric 2 : (Cut 1) 20cmX10cm (Piece for bookmark back)
- Lightweight fusible interfacing (Cut 1) 20cmX10cm
- Ribbon 13cm long
- Embroidery needle and floss
- 15cm embroidery hoop
2. Ask your child to draw a picture inside the marked rectangle. I asked the children to draw a simple drawing because this will be sewn with embroidery floss and if it is too complicated for them to sew it could be frustrating. In this case, my children also wrote Nana/Nanny and 2012 for the year the bookmark was created.
3. Place the piece of fabric inside the embroidery hoop with the drawing in the centre of the hoop.
4. Using a simple back stitch and all six strands of embroidery floss, follow the outline of the drawing and /or words and numbers.
5. When the backstitch outline is complete, with a hot iron, adhere the interfacing to the wrong side of the back fabric piece.
6. On a flat surface, lay the back fabric piece right side up. On top of this place the embroidered front fabric piece right side.
7. Pin in place
8. Start sewing along the top edge of the bookmark one inch from the corner. Using your machine foot as a guide from the edge, sew around all four sides. Ensure that you do not meet the stitches up on the top of the bookmark. You need to leave a 2cm opening so the bookmark can be turned right side out.
9. Cut the tip of all four corners. These cuts will make the corners sharp and less bulky.
10. Through the opening left at the top, turn the bookmark right side out. Using a knitting needle (or a chopstick) carefully push out the four corners
11. Press
12. Thread the thumb print charms onto the ribbon13. Fold the ribbon with the pendants attached in half
14. Place the loop inside the 2cm opening on the bookmark - half way along the width.
15. Pin the ribbon loop and pendants in place.
16, Top stitch around all four sides of the bookmark (Double stitch the top edge to securely fasten the ribbon to the bookmark)
17. DONE!


No comments:
Post a Comment